Today in class we were being taught the absolute basics of Lighting and Point Lighting specifically. My Media Studies teacher, Sir Nadeem Zulfiqar, started off by switching off all the lights in the classroom and told a handful of students to switch on their phone torches. Point Lighting is the most common form of lighting found in studios and 3-point lighting is the standard that's adopted by most studios.
In a 3-point lighting system, the "Key Light" is the main source of illumination for the subject. It's the brightest light source that is used on set.
The "Fill Light" is the second source of illumination on set. Its brightness is usually around 60% of the Key Light's brightness and is used to fill in the harsh shadows that are left by the Key Light. Fill Lights are almost always diffused so that the sharp shadows can be replaced with aesthetically pleasing soft shadows. Both of these lights are usually positioned at a 45 degree angle on the Z Axis and are placed high above the subject.
The third type of light is the backlight. The backlight is positioned right behind the subject and can be used in a few different ways. If the subject has a dark backdrop, the backlight can be used to shine light towards the background, creating a very pleasing backdrop that defines the subject and makes it stand out from the background, just like how "bokeh" is created in a lens with a wider aperture. Another way to use it is by shining the backlight towards the subject and thus creating an outline of the subject. This method is called the "Rim Light". Both are very commonly found in studios and each serve their own purpose. Lighting the background with the backlight is a good way of defining a human character from the backdrop and gives a very professional and clean look.
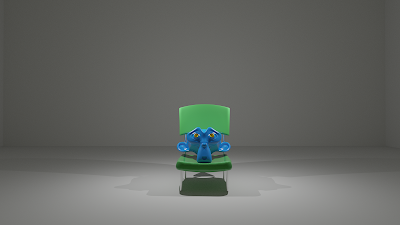
The room was darkened so that we could use our phone torches to light the model and take interesting photos. We used a 1-point lamp system, a 2-point lamp system and a 3-point lamp system. One tiny detail I should tell is that I was the model in this case. I wasn't able to take any photos of my own but I simulated whatever happened in the class by making 3D renders in Blender 2.8
This was the 1-point lamp system. It was fairly simple. I imported my 3D Models from previous projects, created a plane mesh, increased its scale and extruded the edges to resemble a room studio. The Point Lamp's size and radius was decreased so that I can ensure those harsh edges on the shadows. The wattage was 50 watts.
The two-point lamp system was also simple. I duplicated the key light, placed both on opposite ends of the monkey head and it created a rather unique shadow. Lighter shadows can be seen on opposite ends of the chair and the darker shadow can be seen right below the chair with no angle. As for the monkey, lighting can be seen on both ends of the head but a very dark shadow line down the middle.
The three-point lighting system took the longest to render because of how many light bounces were occurring in different areas of the frame. The key light is in the same position as it was in the 1-point lamp system, I added an area lamp with 45 watts and a wide radius as the Fill Lamp. The large scale of the area lamp and the lower wattage gave softer shadows and did not create any significant reflection on the right side of the monkey head. The backlight was very soft but it did create a soft outline around the chair if you look closely. I just duplicated the key light and reduced its wattage to 30 watts.


No comments:
Post a Comment